Session now has Detailed Reports

As many of you now, I’m an absolute advocate of the Pomodoro Technique when it comes to executing my work. Splitting my time into smaller, focused blocks really does work and it allows me to even have shorter work days on occasion and spend more time taxi-ing the kids around - which seems to form much of my existence currently. 

My app of choice on both Mac and iOS to help me manage these timers is Session. The main reasons for this are the ease of use and the level of detail that the developer goes to in order to keep the customers happy. It’s clearly a passion project and the latest update just goes to underline that. Session has always had a report functionality that allows you to look back at previous sessions and look for trends. This is down to the ability to rate your sessions when you are complete - were you completely focused or a little distracted? If so, you can make notes to go into more detail as to the reasons why. 

monthly-view.png

These reports just got some love because there is now more detail available. You can look analyse the dates and times that you are most productive based on how you score your sessions. This is great - I mean just think. If you have some work to do that involves some real heavy-lifting of the brain, you don’t want to try and do this when, historically, your attention can easily wander. It needs to be done when you are mentally ‘on-it’. Session can help you track when these times of the day/week are and you can schedule accordingly. I think this is an awesome addition and I’m already spotting some surprising trends.

 
weekly-view.png
detailed.png

As you can adjust the time spent focusing, from the default 25 minutes, you can now also track how much these change at different times of the day? Am I spending more time focusing this month than last? 

In essence, you can now easily use data to determine whether you are being overloaded so that you can course-correct as appropriate. 

Well played Phillip

Use Your iPhone Keyboard Like a Boss

For all iPhone users, the keyboard is the piece of functionality that gets the most use - I don’t think that can be disputed. No matter the application, there is a good chance you are going to use the keyboard so it makes sense for you to make this as easy as possible. There are lots of tips and tricks to maximise your efficiency with it - some are well known, others not so. 

Here are a few of my favourites. Certainly not a comprehensive list of everything you can do but I play with these bits the most. 

Settings

If you go to Settings -> General -> Keyboard there are lots of options here to play with. 

You can enable/disable Auto-Capitalisation for words, Auto-Correct and the checking of spelling as you type.

Enable Caps Lock is a solid option. If you tap twice on the shift key then this enables Caps Lock - until such time as you tap it again. 

Other notable settings here include turning off Predictive Text, turning off the Character Preview which is the enlarged image of the key that shows when you tap it. Also, the ”.” Shortcut allows you to double-tap the space bar to insert a full stop/period, followed directly by a space. 


IMG_0017.PNG

Text Replacement

If you are familiar with tools like TextExpander then you know all about Text Replacement. You can use short snippets of text and expand them to form longer sentences/characters. Very useful if you have strings of emoji characters that you use often. Simply type in the shortcut and the longer phrase will be offered as an option in the Quick Type window.

IMG_0018.PNG

Shake to Undo, Swipe to Undo (three fingers)

The faster you type, the easier it is to make a mistake. No problem, simply shake your iPhone to bring up the Undo popup or swipe across on the screen with three fingers to the left to Undo - or the right for a nifty little redo option

Double or Triple Tap to Select

Need to select some text for formatting or copying? Double-tap to select a single word, or triple-tap to select the entire paragraph

Added bonus - did you know that once you have highlighted your text, you can pinch with three fingers to copy the text and then pinch once more to cut? I think I found this by accident using an iPad. Useful. 

Turn into Trackpad

If you keep your finger on the spacebar, you can convert your keyboard into a trackpad, allowing precision placement of the cursor. 

If you use a second finger to tap whilst moving the cursor in this fashion, you can select text easily as well. 

Tap and Hold a Letter for more options

Most keys on the keyboard have more than one option. Long press on a character key to look at various accented characters or different punctuation marks.

IMG_0019.PNG

Lookup Dictionary Definitions

Did you know that you can look up the definitions of words you have typed without the need to shift to another application? Simply select the text - then choose Look Up from the pop-up menu and you’ll be presented with the definition.

IMG_0020.PNG
IMG_0021.PNG

Left/Right Handed Keyboard

Finally, if you struggle to use the keyboard with one hand, you can actually move the keyboard to either the left, or the right hand side of the screen. 

Long press on the emoji icon in the bottom left hand corner and position the keyboard on either the left or right of the screen as needed. Or put it back in the centre if you find the resulting keyboard too small.

IMG_0022.PNG
IMG_0023.PNG
IMG_0024.PNG

Custom Searches in Alfred

Whenever I need to search for anything, whether it’s on my Mac or online - I use Alfred. It’s so ingrained in my muscle memory I’d have to work incredibly hard to STOP my fingers from travelling directly to my Alfred hotkey and kicking off a search. 

Alfred has a large number of default search locations available online and they are listed below. You may, however, need to create your own custom search. And this is very easy

Alfred 1.png

Let’s take an example. As the majority of you know, I create lots of videos for Screencasts Online and regularly need to research different apps. The first step I usually take involves searching the ScreenCasts Online website to confirm that the app hasn’t already been covered - and if it has, when was it done? Does it need an update/refresher video?

Opening Alfred and searching ScreenCasts Online for that app is the way to go and this is how to do it. 

1 - Carry out a search on the site you wish to add

Open up the website and search for something. In this case, I’ve opened ScreenCasts Online and searched for Alfred. The URL is displayed in the screenshot below

Alfred 2.png

2 - Copy the URL

Press Command + L to go to the address bar and then Command + C to copy the URL to your clipboard. This will need to go into Alfred. 

3 - Invoke Alfred -> Features -> Web Search

From here, click on Add Custom Search in the bottom right hand corner

4 - Paste the URL

In the first field, named Search URL, paste in the URL you just copied with Command + V. Be sure to replace the search term with the query in curly brackets, as below. Instructions are there underneath the field. You could, alternatively, just type in the name of the domain and press the Lookup button and if the site supports OpenSearch or SearchAction, Alfred can find the correct URL automatically. 

5 - Assign a Title and Keyword

Give the Custom Action a title - this is what is going to be shown in the search results. Then assign the keyword, or the abbreviation, that will be used to instigate the search. 

6 - Test

Some text is already filled in the validation field - Alfredapp - and if you click the Test button to the right, then Alfred will carry out a test search on that site. 

If it works, click Save.

Alfred 3.png

Now, when you invoke Alfred and type in the keyword you specified, followed by the search criteria, Alfred will do the work for you. 

It’s a great feature and another reason I love Alfred.

Alfred 4.png

Multitasking on iPadOS 15 - A Winner

Ever since the concept of multitasking was introduced on the iPad, I’ve never been a big fan. It just seemed so - I don’t know - fiddly. Lots of swipes and gestures to remember, being someone that comes almost exclusively from a laptop/desktop background, the effort of learning all of these new ways of working seemed a little much - especially with the restrictions (at least then) that working on the iPad provided. 

I think iPadOS 15 though takes multitasking to a different level. It doesn’t, necessarily, change what you can do (although there is a killer new feature that I’ll touch on shortly), moreover it makes the existing features more accessible, minimizing the need to think about how to work on multiple apps at once. 

Multitasking Menu

Split View and Slide Over were introduced six years ago now - something that really surprised me when I checked this out. That’s a long time for a feature that I rarely if ever use. And that’s on me, it’s in no way a criticism - as mentioned earlier, I’m desktop-centric as opposed to looking to use my iPad for much more than fun and larks. 

The multitasking menu, accessible from any iPad application via the three dots into the top centre of the window, makes it easier to access those features. When you tap/click it, there are three options presented to you. From left to right we have:

Full Screen - move the application into Full-Screen mode. 

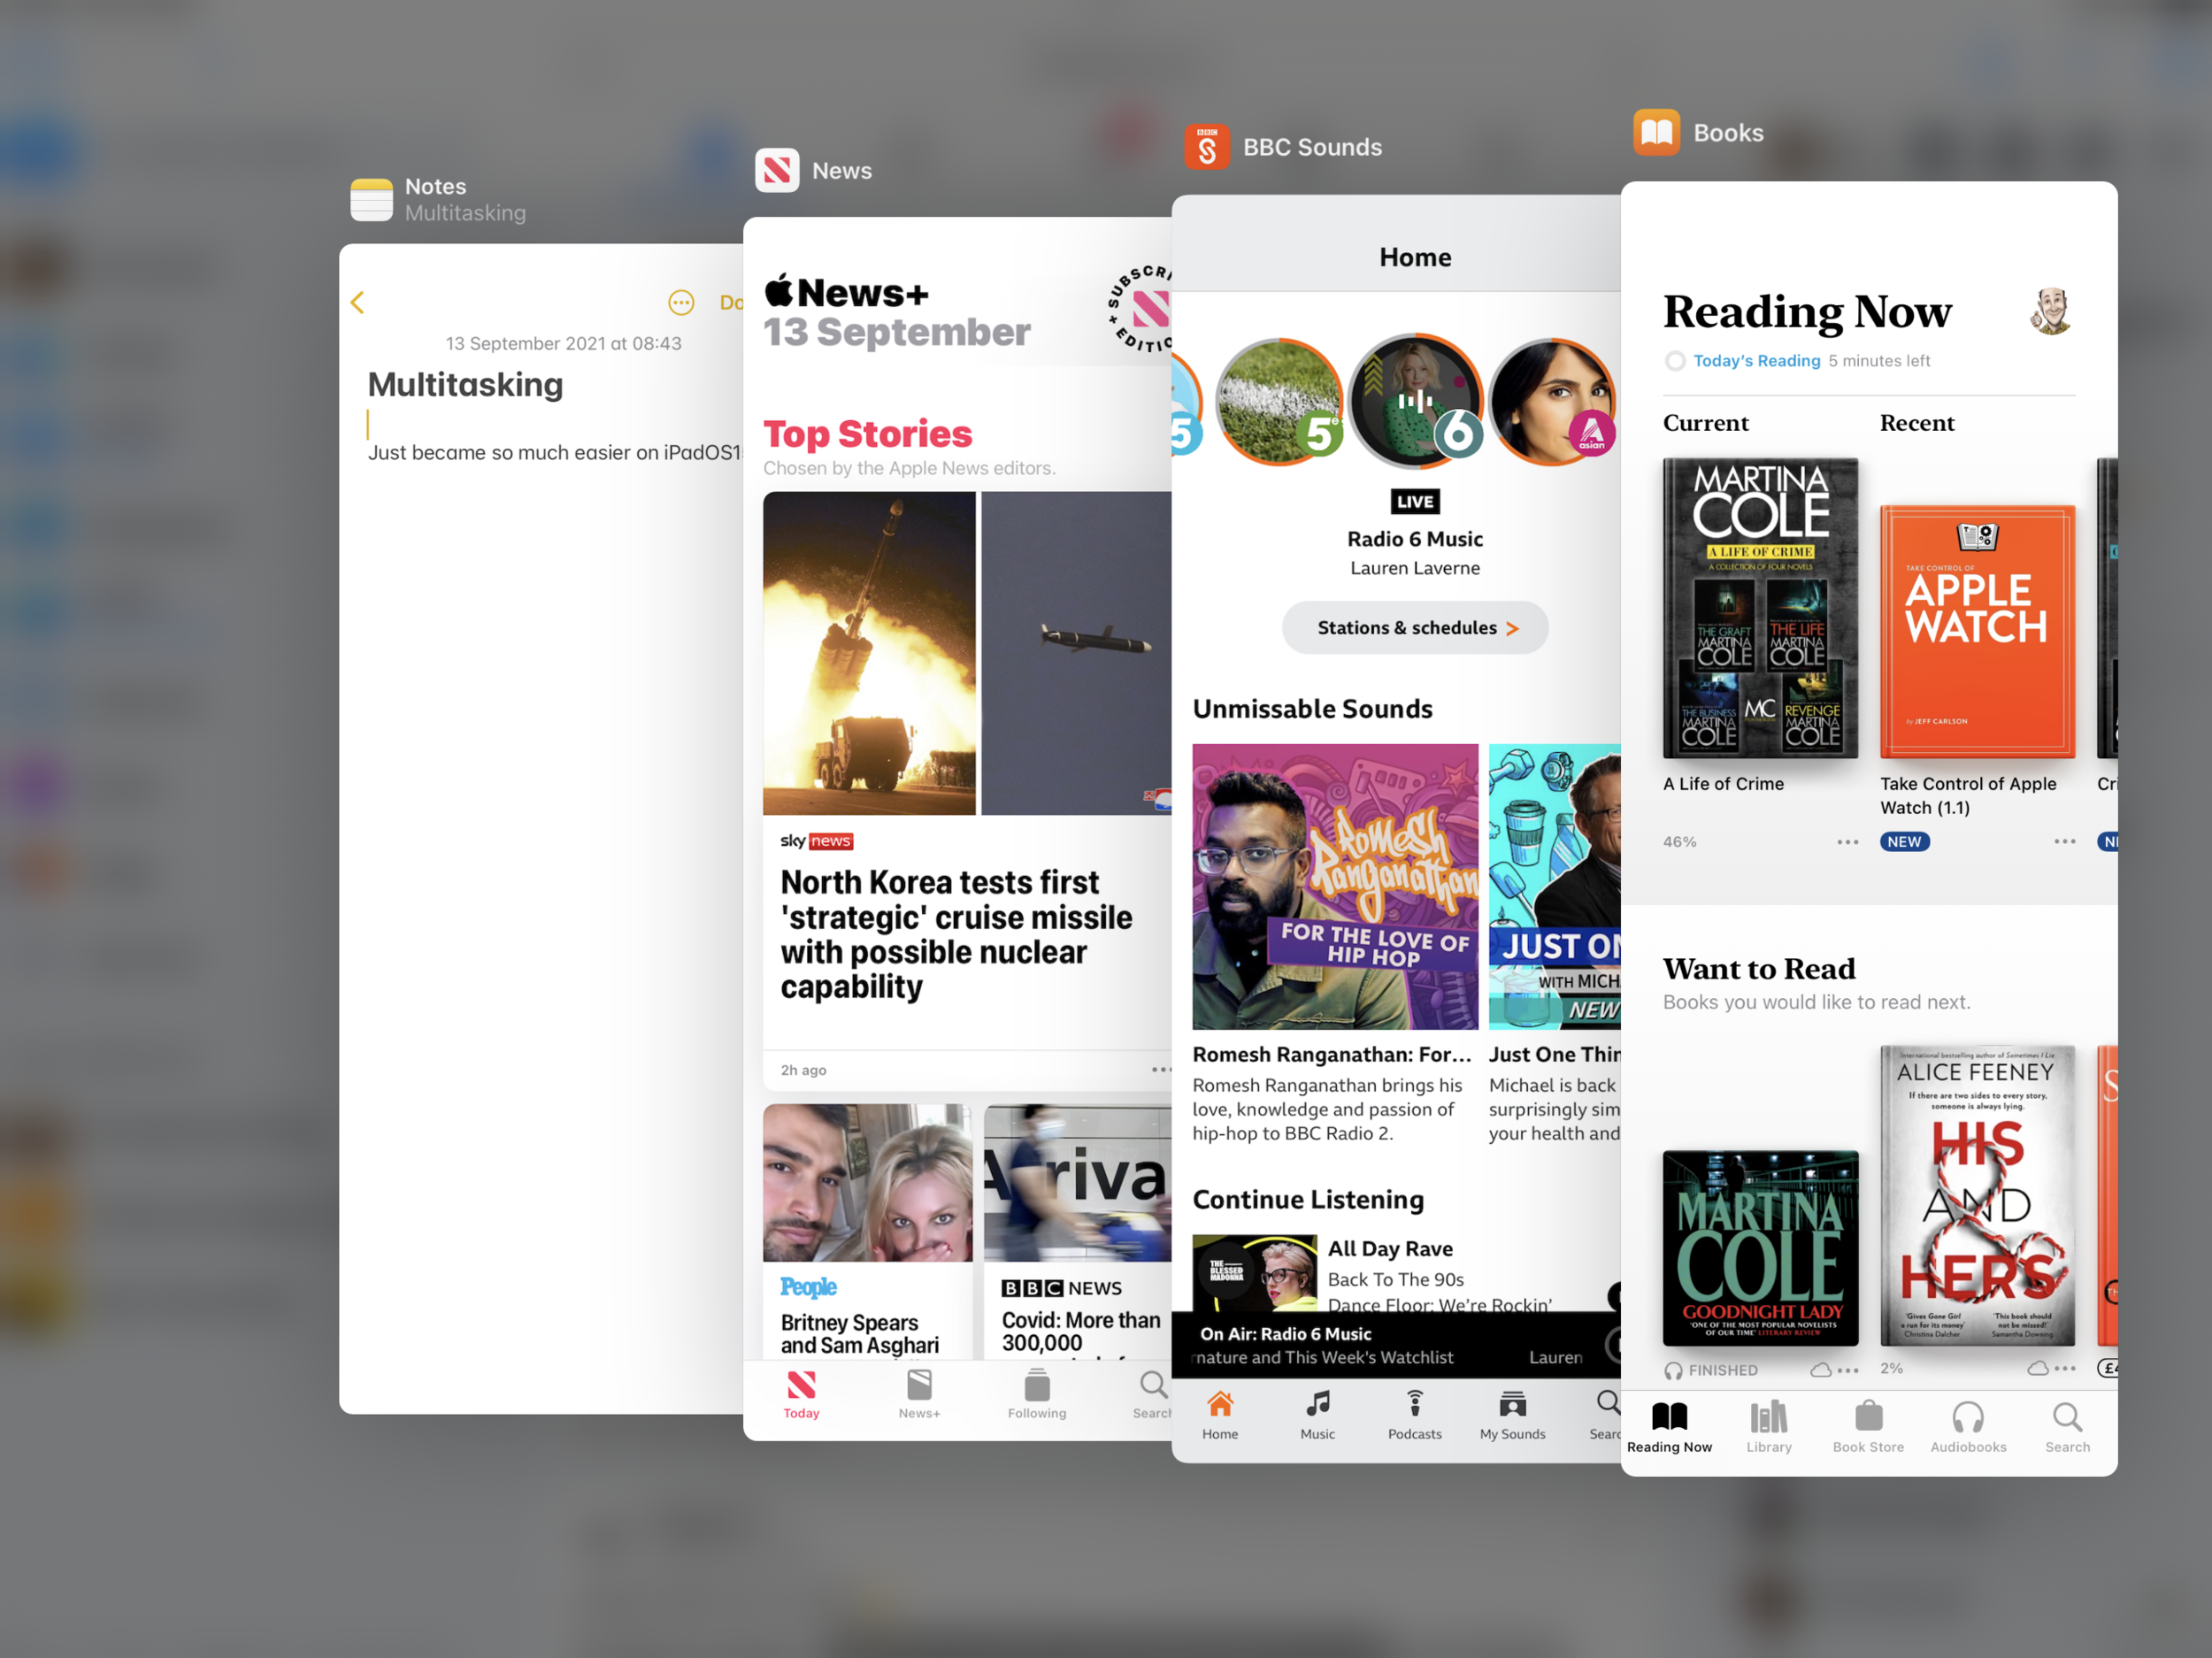
Split View - this places the application into Split View - or at least starts t. It will move itself to the far side of the screen, just enough for you to see it poking out from the bezel where it will ask you to select another app to split the screen with. Once you have selected one, both apps will be side by side in Split View

Slide Over - Slide Over is my favourite of these views and the one I have started to use most often as I try to kick-start my iPadOS lifestyle. You’re not restricted to having just one app in Slide Over accessible at any one time. Just slide up from the bottom of the slide over window and choose from the list of slide over apps you’ve selected. It’s great

IMG_0008.PNG

The Shelf

Whilst other third-party applications have provided shelf functionality to iPadOS for the last couple of years, we now have it baked into the main operating system itself and it works very well. Whenever you tap on the multitasking menu, if there are multiple windows available within the app, they will be shown at the bottom of the screen and you can tap to select the one you want - or even create a new window by tapping on the plus button to the far right.

I was surprised at how natural using these features felt when I first used them. It didn’t feel like I needed to commit anything to memory that I would consciously, have to try and find later - the muscle memory was instinctive and now I see those three multitasking menu dots in the same vein as I see the traffic lights in the top left-hand corner of a macOS window. It’s just - easy.

And that works as a summary for both iOS and iPadOS 15. They do not share any ground-breaking features, nothing that is going to make you want to rush and get them downloaded. However, what they offer, is good consolidation and in my eyes, that makes it a very strong release.

IMG_0010.PNG